Hey guys, I've decided to start doing posts of my cooking here and there. Since getting married, I've become quite the avid cook. My skills have been getting better and better, which is great seeing that I started from scratch. When I was "single & fabulous", the only "cooking" I did was reheating take-out in the microwave. haha
So, two nights ago I was perusing Food Network online for a new chicken dish to try. The Food Network is one of my favorite channels and I have used lots of recipes from different shows. I tend to use a lot of Paula Deen, Giada de Laurentiis (Everyday Italian), and Down Home With the Neelys recipes. Well this time I chose a recipe by Ina Garton of Barefoot Contessa. I chose it because I'm a lover of all ethnic food, and this chicken recipe was right up my alley. I decided to also make the two side dishes she'd made with this dish. So here are the recipes.
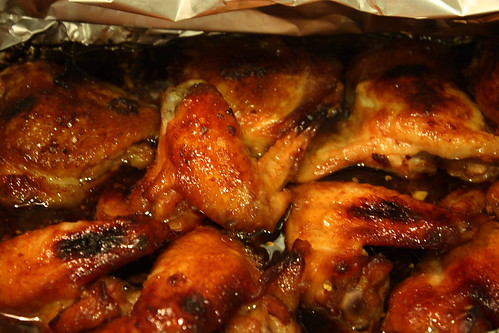
Indonesian Ginger Chicken
Ingredients:
* 1 cup honey
* 3/4 cup soy sauce
* 1/4 cup minced garlic (8 to 12 cloves)
* 1/2 cup peeled and grated fresh ginger root
* 2 (3 1/2 pound) chickens, quartered, with backs removed
Directions:
Cook the honey, soy sauce, garlic, and ginger root in a small saucepan over low heat until the honey is melted. Arrange the chicken in 1 layer in a shallow baking pan, skin side down, and pour on the sauce. Cover the pan tightly with aluminum foil. Marinate overnight in the refrigerator.
Preheat the oven to 350 degrees F.
Place the baking pan in the oven and bake for 30 minutes. Uncover the pan, turn the chicken skin side up, and raise the temperature to 375 degrees F. Continue baking for 30 minutes or until the juices run clear when you cut between a leg and thigh and the sauce is a rich, dark brown.
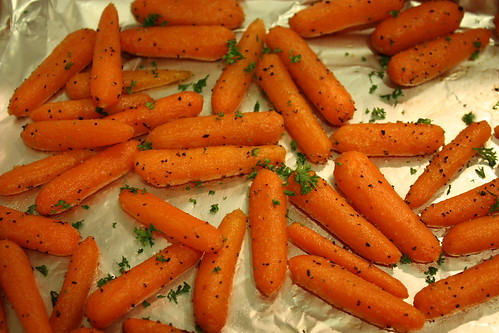
 Roasted Carrots
Ingredients:
* 12 carrots
* 3 tablespoons good olive oil
* 1 1/4 teaspoons kosher salt
* 1/2 teaspoons freshly ground black pepper
* 2 tablespoons minced fresh dill or parsley
Directions:
Preheat the oven to 400 degrees F.
If the carrots are thick, cut them in half lengthwise; if not, leave whole. Slice the carrots diagonally in 1 1/2-inch-thick slices. (The carrots will shrink while cooking so make the slices big.) Toss them in a bowl with the olive oil, salt, and pepper. Transfer to a sheet pan in 1 layer and roast in the oven for 20 minutes, until browned and tender.
Toss the carrots with minced dill or parsley, season to taste, and serve.
 Basmati Rice
Ingredients:
* 1 tablespoon unsalted butter or olive oil
* 1 yellow onion, chopped
* 1 cup long grain basmati rice
* 1 3/4 cups water
* 1 1/2 teaspoons kosher salt
* 1/4 cup sliced scallions
* 1 tablespoon minced fresh parsley
Directions:
Cook the butter and onions over medium heat until translucent, about 3 minutes. Add the rice and toss until all of the grains are coated with the butter. Add the water and salt, cover and cook until the water is absorbed and the rice is tender, about 15 to 20 minutes. Turn off the heat and allow to sit covered for 5 to 10 minutes. Add the scallions and parsley, fluff with a fork, and serve.

Mods & Tips:
- Instead of chicken quarters, I used wings and thighs (skin on). In the future, other than the wings, any other chicken parts that I use, I will make sure they are SKINLESS. Even marinating as long as it did, the skin seemed to get all the flavor. Because I don't usually eat the skin on chicken (except on wings), I'd rather the meat get all the good flavors. Also, I added some red pepper flakes to the marinade to give it a little kick.
-As you can see, instead of going through all of the trouble of peeling and slicing carrots, I used baby carrots.
-The rice I used wasn't basmati. I used what I'd already had in the cupboard, which was instant rice. It still came out PERFECT, and was actually a surprise highlight of the meal!
-Put your fresh ginger in the freezer--it makes it easier to grate later!
-Lastly, where she uses kosher salt--I'd used sea salt, again, what I'd already had in the cupboard.
This will definitely be added to the repertoire!